The Pre-Pack method may be used to ship two or more identically packed cartons to each store. Each master carton will contain the same quantities of the same UPCs. This method allows you to pack multiple cartons quickly and works well if you are creating either a Single-Order Shipment or a Multi-Order Shipment. As long as each location in the Shipment is being packed with identical assortments — the same quantities of the same item — the Pre-Pack method is the most efficient way to pack.
Let’s get started.
Once you’ve created your Shipment, open the document by clicking on the Shipment number in the Open Shipment folder. This is shown as the Doc ID. You will need to verify the Packing Type field is set to Pre-Pack. Next, click Pack Shipment – this will open the Pre-Pack Packing screen.
NOTE: If you have trouble getting to the Pre-Pack Packing screen, make sure your pop-up blocker is turned off. If you still have trouble accessing the screen, hold down your CTRL key and click Pack Shipment again. This should disable any blocking mechanism.
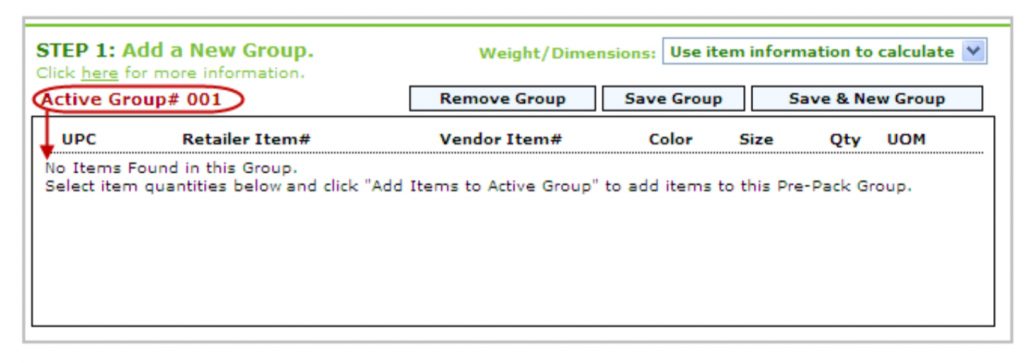
Once your Pre-Pack packing screen comes up, you can begin packing each size run. Remember, you will only need to pack each size run once — Lingo will use the information you enter and pack all your items under that size run as many times as the quantities ordered allow. Each time you define a size run, it will be known as an Active Group.
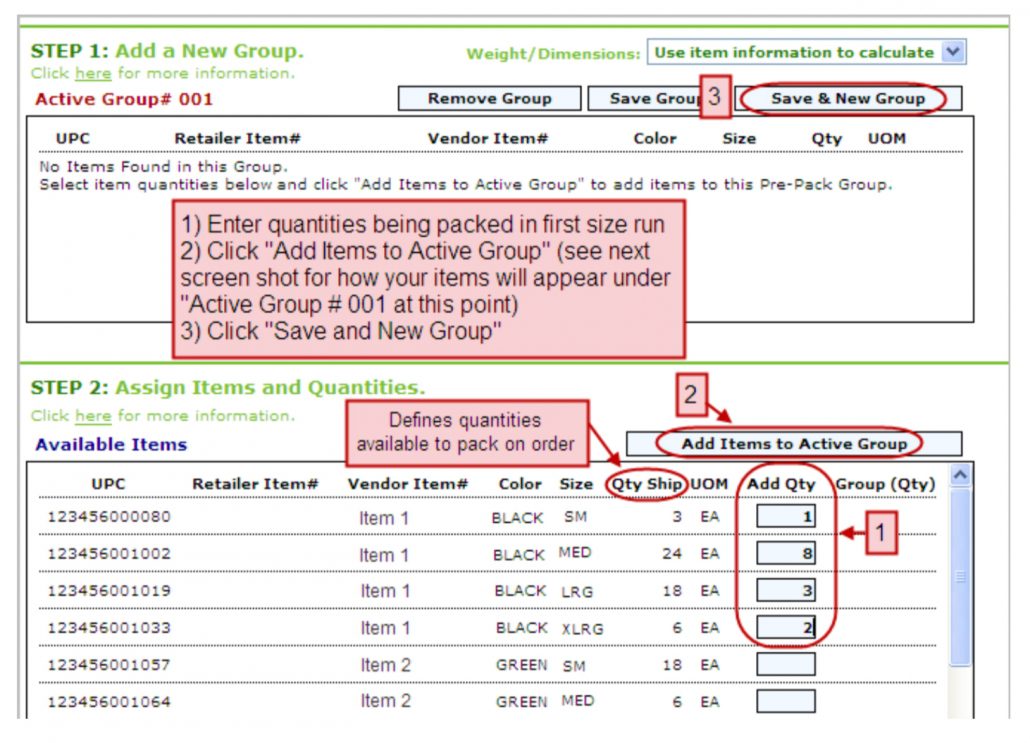
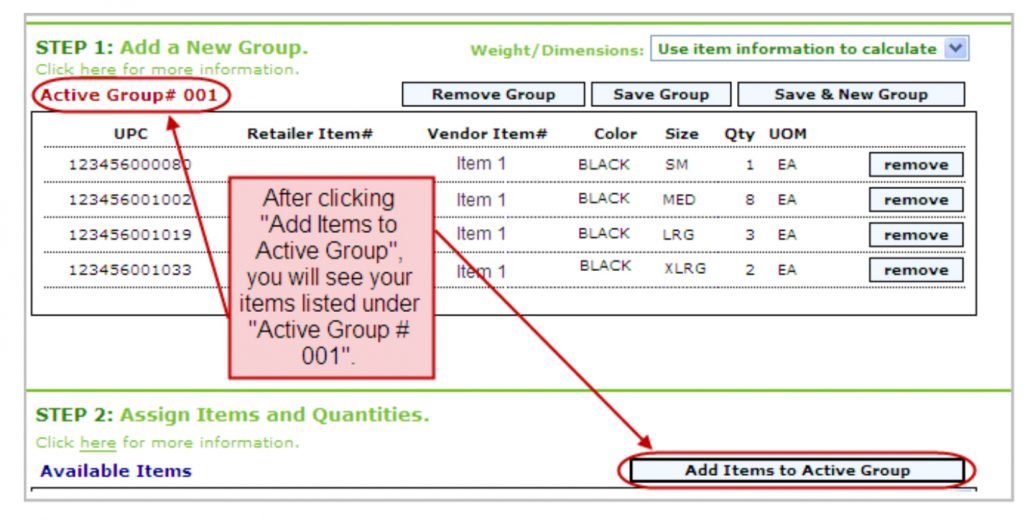
To define Active Group 1, scroll to Step 2 and begin entering the items you will be packing in your first size run. Start by entering the quantities in the Add Qty column. Once you have finished entering the quantities for this size run, click Add Items to Active Group. Then click Save & New Group.
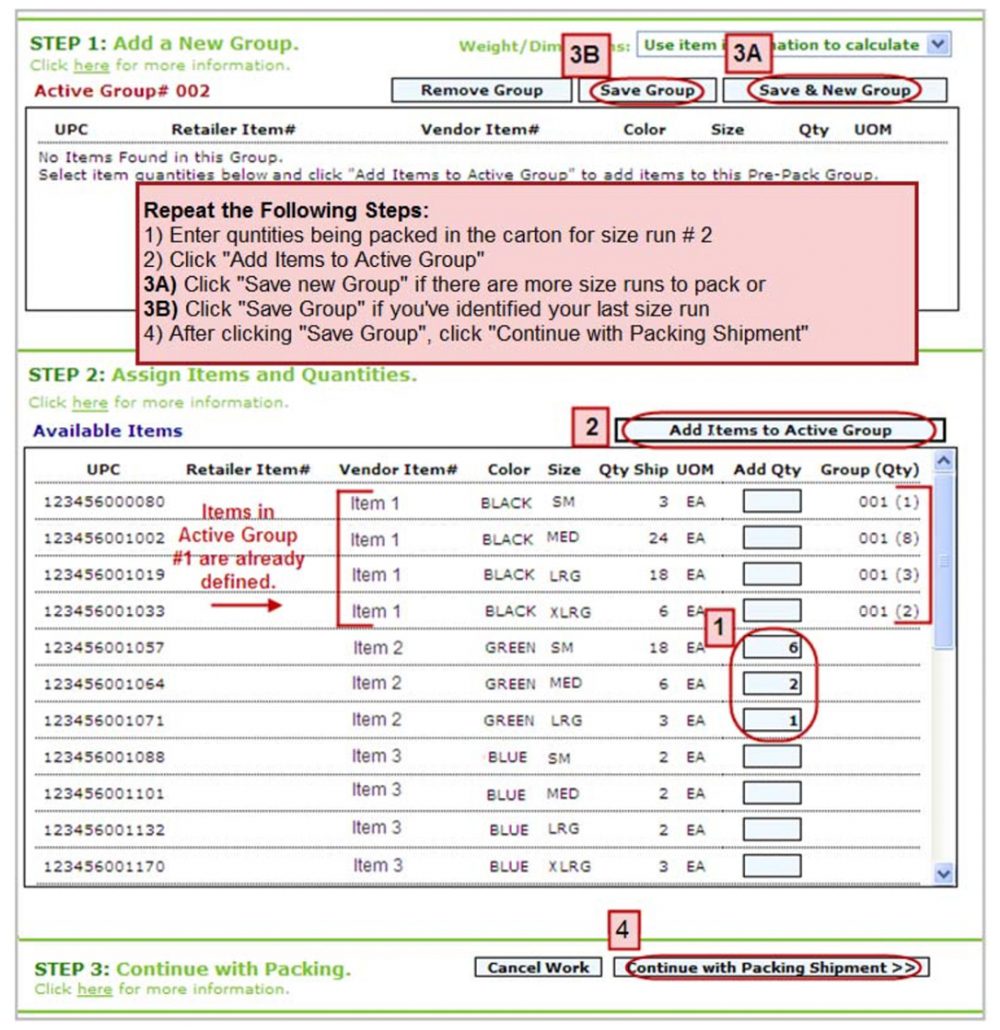
When your Pre-Pack screen refreshes, Active Group 2 will appear in the upper left. To create a second size run, you must define the contents of this group. To do this, begin by entering the quantities that will be in these cartons. Once you have finished entering the quantities for Active Group 2, click Add Items to Active Group. Then click Save & New Group. Continue to add New Groups until you have completed every different size run you need to ship. Once you have finished adding your last item to your last group, you will click Add Items to Active Group, and click Save Group. Don’t worry if you accidentally click Save & New Group after defining the quantities in your last carton — you can correct this by simply clicking Save Group to complete your packing. Once this is done, scroll to the bottom of your Pre-Pack screen and click Continue Packing Shipment.
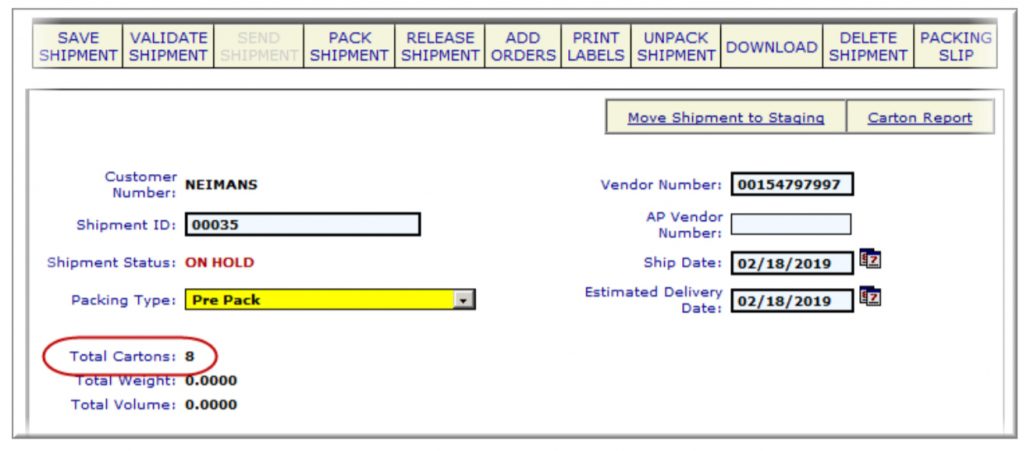
When you click Continue with Packing Shipment, your Shipment will refresh and indicate the number of cartons that are packed. You should always double-check to ensure the Shipment is packed as you intended.
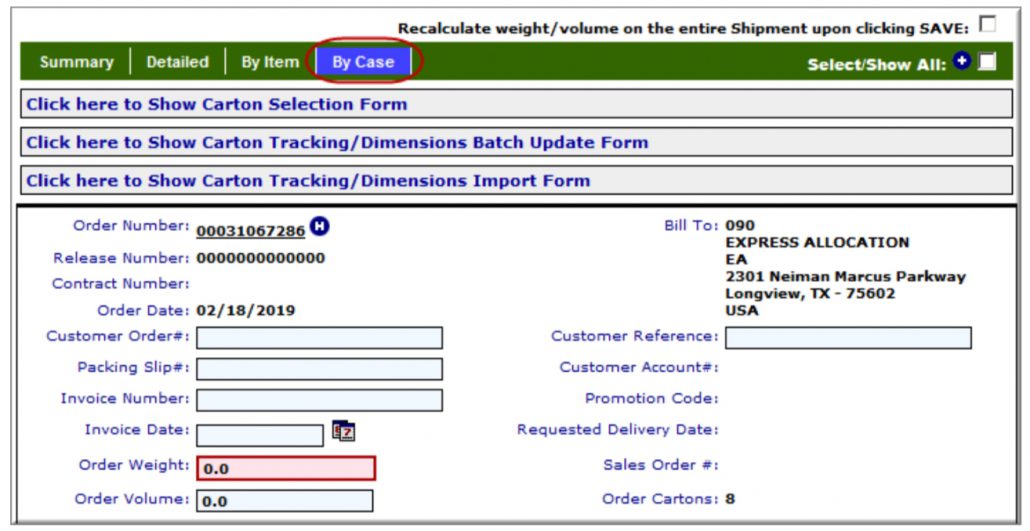
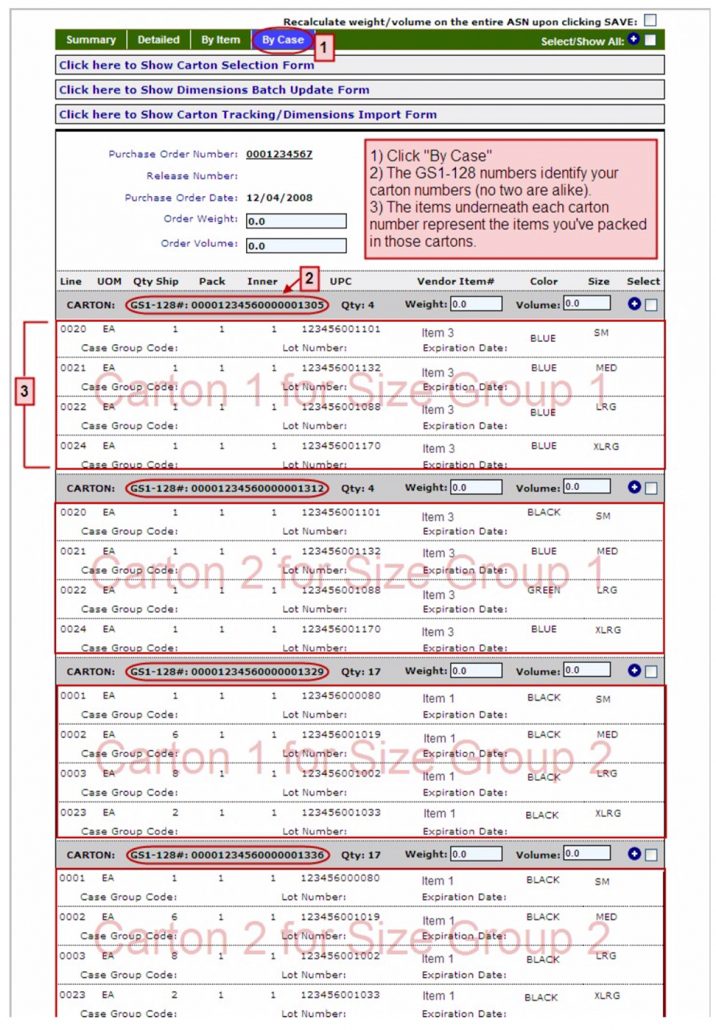
To check your pack, proceed to the By Case view of your Shipment.
Once on the By Case view, scroll to the lower portion of the Shipment document. The By Case view displays your carton numbers (GS1-128 label numbers) and their contents. IMPORTANT: The packing of your “virtual” cartons must be exactly the same your actual cartons.
This concludes the Packing Shipments—Pre-Pack (Size Run) tutorial. Remember, our Support Team is ready to assist you as you start packing your Shipments. You may reach us on Support Line (877-765-3564, Option 2) or through the Help/Contact Us feature within your LINGO account.


